
I remember growing up, in December my mom would make a hot coco station on the kitchen island. Lots of packets of Swiss Miss, Jett Puff marshmallows, candy canes, of course we loved it, but thinking about doing that now for my children gives me a bit of anxiety!
But there’s something really comforting and festive about a mug of hot coco with a big fluffy marshmallow on top! And since most of us in our family can’t tolerate conventional diary (only raw), I began making this cleaner version of a non-dairy hot coco mix a few years ago. With only three ingredients (instead of all the junk in the store bought mix), I don’t feel so bad giving it to my children. I’ve even figured out a way to bring some major immune boosting benefits to this treat without them even noticing the difference!
non-dairy hot coco mix
Ingredients
- 1 cup organic fair trade coco powder
- 2 cups organic coconut sugar
- 1/4 tsp salt ( I use icelandic)
Directions
- Add to a large glass mason jar, make sure lid is on tight and shake!
- To use, add 1 tbs to about 4-6 ounces of hot milk ( we use raw whole milk with a bit of heavy whipping cream in it!) Because this isn’t like conventional store bought mixes that have powdered milk in them, you will need to add to the milk of your choice! I’ve also used this with almond milk and plant based whipping cream and had delicious (and vegan!) results as well!
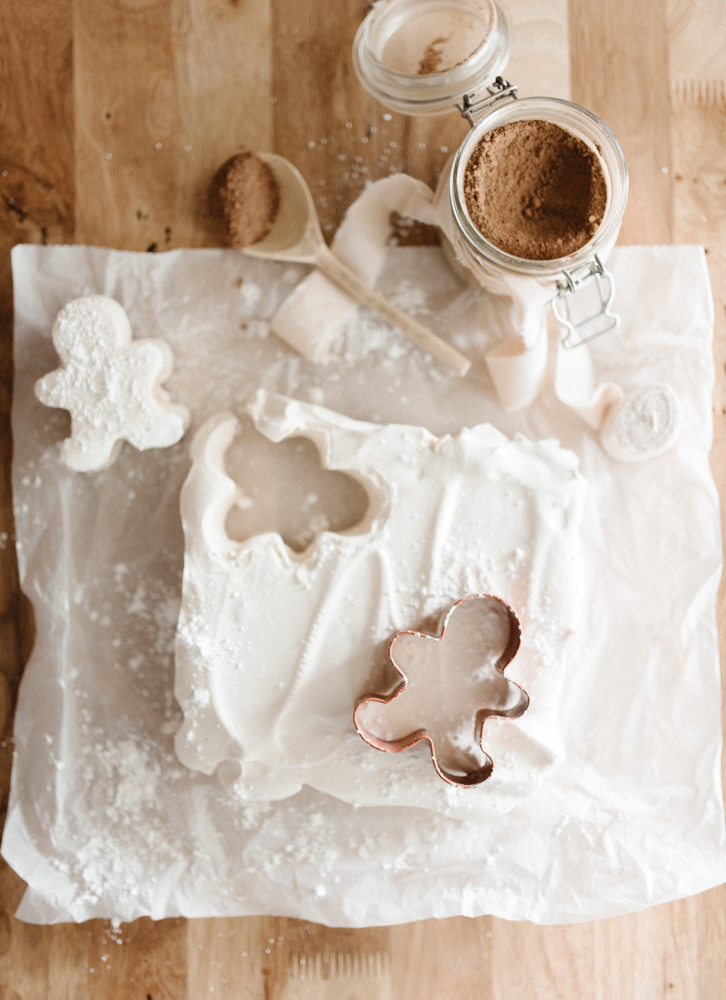
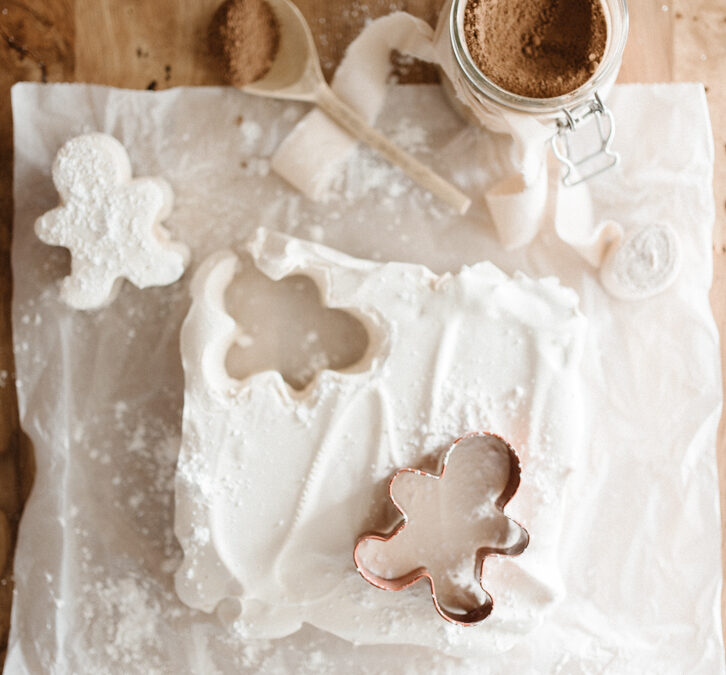
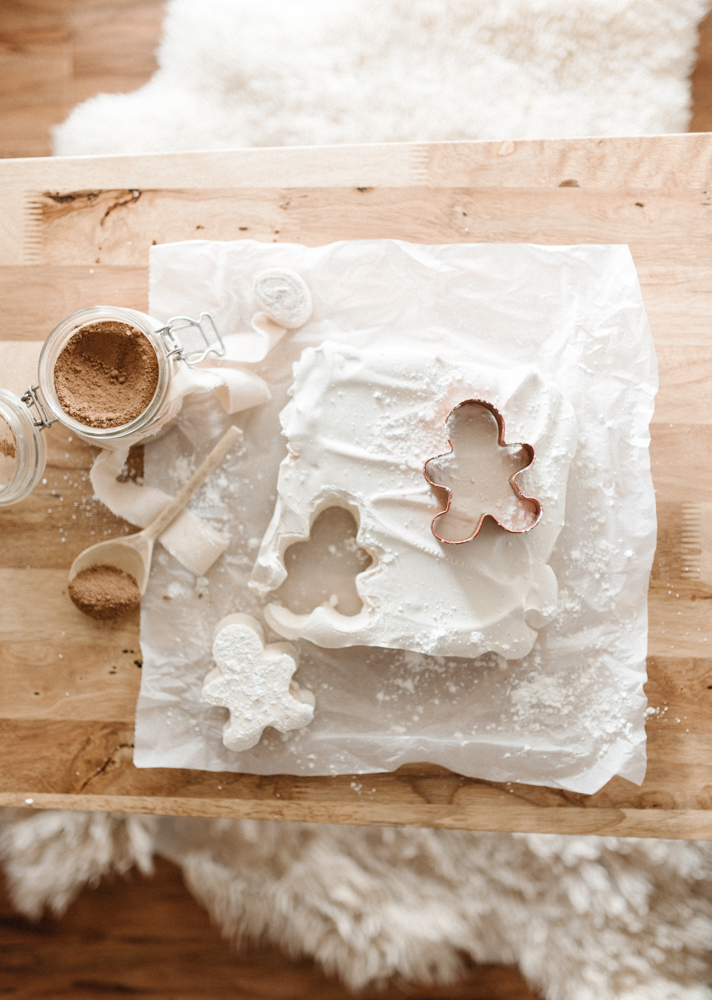
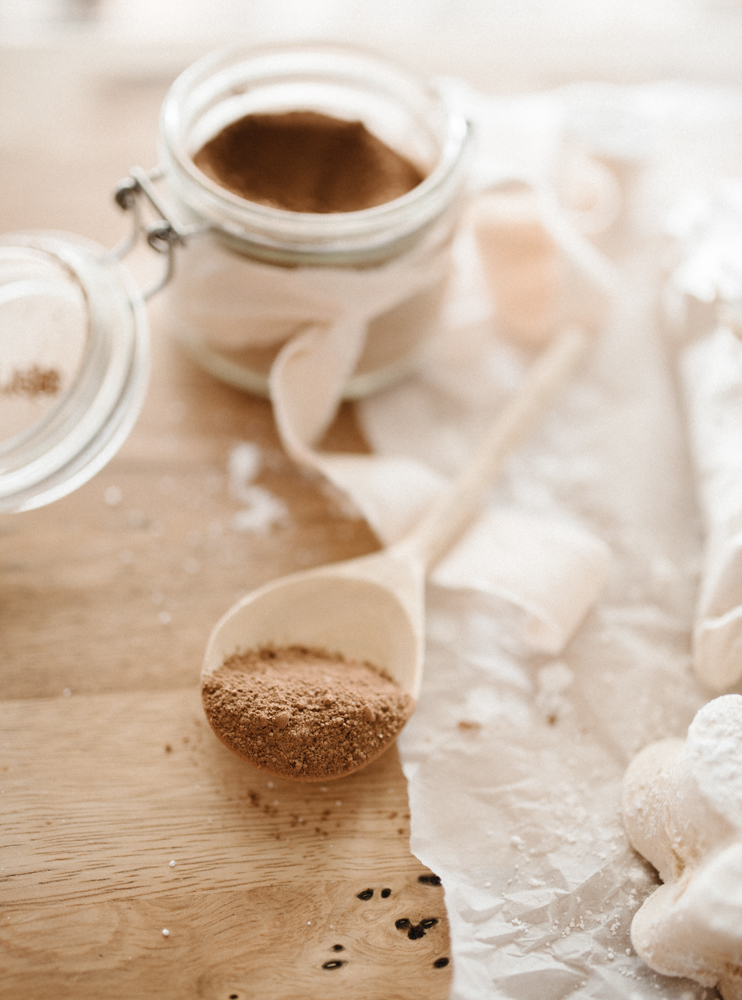
My added immune boosting benefit? I add 1-1 tsp (per cup) of THIS chocolate super food powder (that we have been using for the past couple of years) when I make their hot coco! It tastes so yummy that they don’t even notice, but I know they are getting a ton of greens (yes GREENS!!) when they drink their beloved treat!
What adds more immune boosting power to this delicious drink? Homemade (processed sugar free!) marshmallows! Here’s how we make them:
fluffy homemade marshmallows
Ingredients
- 1-1/4 cups water (divided)
- 1-1/2 cups honey, agave, or maple syrup
- 4 tablespoons gelatin powder – I use THIS one
- 1/4 teaspoon icelandic salt
- 1 teaspoon vanilla
- powdered sugar for dusting
Directions
- Line an 9×13 baking dish with parchment paper and coat with coconut oil to use later
- On the stone top, bring the sweetener (honey, agave, or maple syrup) and 3/4 cup of the water to a boil over medium high heat. Once the mixture has boiled, reduce the heat to medium.
- Using a food safe thermometer, let the sweetener and water continue to boil until it has reached 242-245 degrees. While that is heating, add the remaining 1/2 cup of water and gelatin to the bowl of a stand mixer.
- Once the sweetener mixture has reached 242-245 degrees, remove it form the heat. With the mixer on low, pour the hot liquid into the bowl of the stand mixer, making sure to pour it down the side of the bowl so as not to scorch the gelatin.
- Turn the mixer to medium high speed and beat the mixture for 5 minutes.
- Add the salt and vanilla extract and beat on high speed for another 5 minutes or until the mixture is glossy and almost white.
- Using a spatula that has been rubbed down with coconut or butter, quickly spread the honey marshmallow mixture into the prepared dish.
- Let sit uncovered in the fridge for 4-6 hours before cutting.
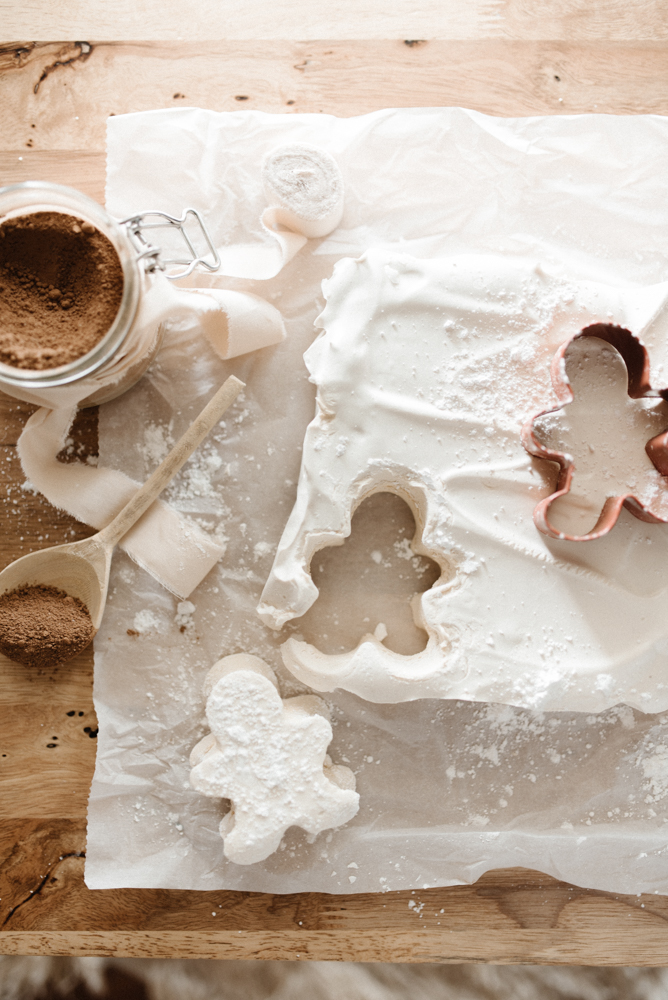
- After the marshmallow cream has set, turn it onto a prep surface. Using a large knife that has been rubbed down with coconut oil or butter, cut it into 1.5 inch squares, or my kids enjoyed using cookie cutters to make festive shapes!
- Toss the marshmallows in a small bowl of powdered sugar, making sure all sides get coated and store in an airtight glass container. ENJOY!

This is great for keeping around the house this holiday season, but also makes a super sweet handmade gift for family or friends, or to bring to your next holiday party as a hostess gift!